d-tags


 (5 votes, average: 4.80 out of 5)
Table of contents:
- What Makes Sitemaps Crucial and When Should You Update a Sitemap?
- Effects of Automated Sitemap Update
- Sitemap 101
- Sitemap Update and Generation – Basics
- How to Add a Sitemap to Google Search Console
- How to Update Sitemap Using Plugins for Popular CMS
- How to Update Sitemap Automatically in Other Popular CMS Platforms
- How to Update Sitemap Automatically in Joomla
- How to Update Sitemap Automatically in Shopify
- How to Update Sitemap Automatically in Hubspot CMS
- How to Update Sitemap Automatically in Drupal
- How to Update Sitemap Automatically in Wix
- How to Update Sitemap Automatically in BigCommerce
- How to Update Sitemap Automatically in Magento
- How to Update Sitemap Automatically in Presta
- How to Update Sitemap Automatically in Shopware
- How to Update a Sitemap if You’re Using a Custom CMS
- How to Update the Sitemap Using Custom Scripts & Cron
- How to Update a Sitemap Automatically – The Takeaway
By adding a sitemap to GSC, you considerably increase your chances for speedy indexing, getting your website to appear in SERP quicker.
How can you generate and update a sitemap quickly and effectively?
We’re going to tell you in this very article. Read on!
What you’ll learn:
- the benefits of uploading an updated sitemap to GSC
- how to generate and update a sitemap automatically using a free WordPress plugin
- how to use external tools to generate a sitemap automatically when using a custom CMS
It’s common for our clients to complain about having site indexing problems. Sometimes they aren’t aware that their websites aren’t indexed at all. In most cases, there are two reasons behind this problem: it’s either because of an un-updated sitemap, or no sitemap at all.
A sitemap must be updated regularly, but don’t worry, this process doesn’t have to be time-consuming. Depending on the CMS you’re currently using, this process can be either partially or fully automated.
In a moment, we’re going to use a few examples to show you how you can make your sitemap update on its own, without too much effort on your behalf.
Additionally, we’re going to show you a real-life example – how one of our client’s websites noted a higher number of indexed pages, and thus increased visibility, after introducing regular sitemap updates.
Do you need help with the technical aspects of your website? Try our technical SEO services and leave them to us!
What Makes Sitemaps Crucial and When Should You Update a Sitemap?
The larger your website is, the more useful and necessary a sitemap gets. Even Google indicates the importance of uploading sitemaps, especially in the case of multi-page and complex sites:
If your site’s pages are properly linked, Google can usually discover most of your site. Proper linking means that all pages that you deem important can be reached through some form of navigation, be that your site’s menu or links that you placed on pages. Even so, a sitemap can improve the crawling of larger or more complex sites, or more specialized files. –Google Search Central Documentation
This means that a website needs a sitemap to help Googlebots understand which pages require indexing faster.
However, generating and uploading a sitemap to GSC just once isn’t enough. The list of pages within a domain must be updated after each change and alteration done on a website. This way you call out the crawlers, pointing out the new pieces of information you want them to index.
The good news is that you can stimulate this process so that it’s carried out automatically. Once you do so, you not only save yourself precious time but also implement an SEO quick win.
Since the processes of generating and updating a sitemap are almost identical, we’re not going to talk about each separately. Instead, we’re going to demonstrate how you can do this on your own, depending on the CMS you use.
Effects of Automated Sitemap Update
Truth be told, an automatic sitemap update is also a great way to improve SEO, especially in terms of creating new web content. Adding information to a sitemap about a recently published article ignites crawling.
How is that?
Simply because the sitemap is updated automatically, and thus sends a signal to the Googlebots to inform them about a new piece of content waiting to be indexed.
This is exactly what happened with one of our clients. At the beginning of our cooperation, there were 197 indexed pages on the website:

We introduced an automatic sitemap update, following the below steps.
This facilitated speedier indexing of new content that was being systematically added to a website – that was one of the SEO tactics we adopted. Our client started working with us in May, and now there are as many as 298 pages displayed on the site:

As you can see on the GSC chart below, the number of indexed pages has been growing steadily.

Looking at the chart, you can also notice the increase in website visibility. However, to picture this positive side effect of an automatic sitemap update a little clearer, we’re attaching the following graph:

It’s easy to see that during these four months, the increase in visibility of our client’s pages almost tripled. To us, it’s a clear sign that speedy indexing took place automatically every time some improvements had been introduced to the website (e.g. through creating new content).
It influenced this positive outcome. If you would like to note similar growth on your website, here’s how to do it.
Sitemap 101
First things first, before describing the method, let’s talk briefly about the basics
Among the most popular sitemap types, we distinguish:
- .html for the internet users, and
- .xml for Google robots.
.html sitemap looks the same as the screenshot below. Its main aim is to help the viewers navigate a website easily, thus improving UX. This, in turn, has a positive effect on SEO.
Simply put, Google favors websites having good UX. So do users.

.xml sitemap is a separate file uploaded to your website, containing the full list of URLs. When added to Google Search Console, the crawlers use this file to understand the relations between the pages within a domain.
What’s interesting, for one domain you can create multiple sitemaps. This often happens when a website contains too many pages to be included in just one sitemap. Currently, one sitemap is limited to 50,000 pages and 50 MB.
Regardless of the number of sitemaps, you can find them all in the sitemap index.
Here is an example of the Delante sitemap index:
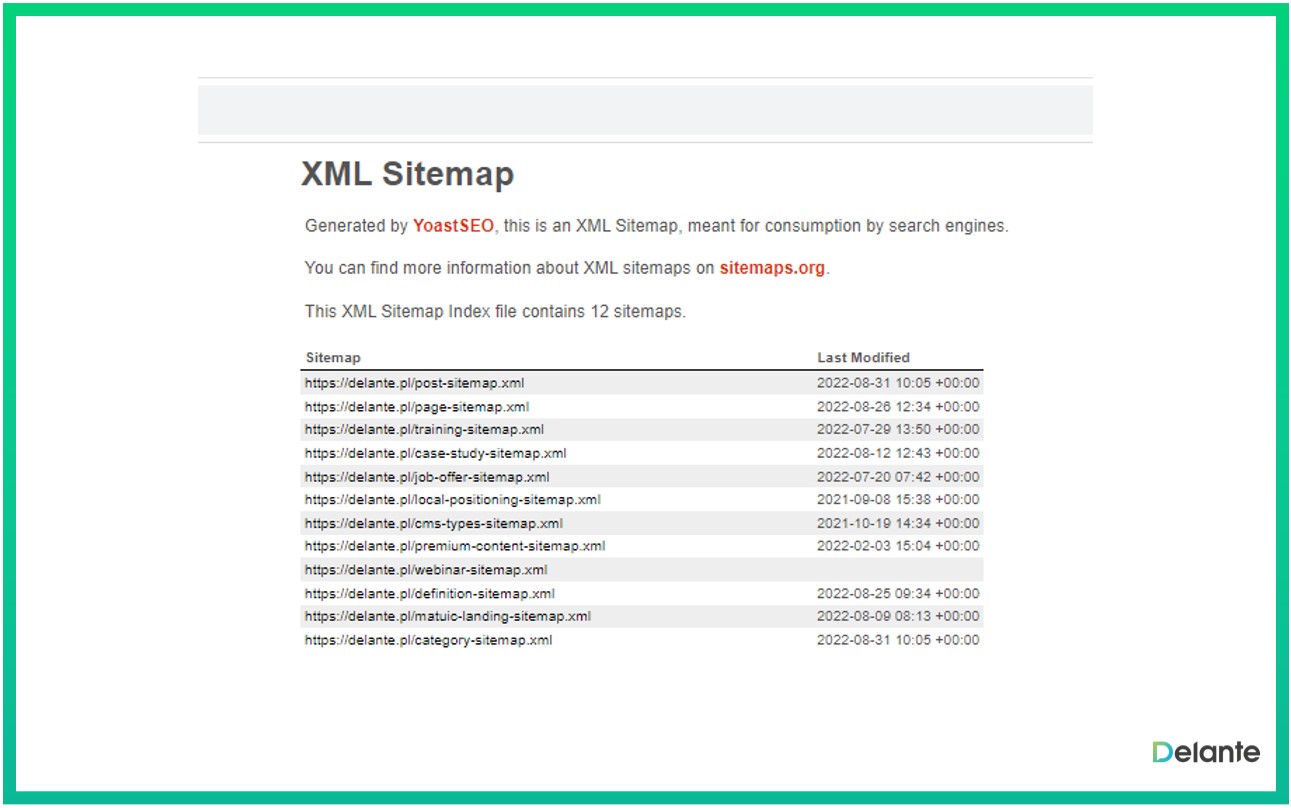
In a moment, we’re going to walk you through automating the process of uploading a .xml sitemap.
If you feel like learning more on this topic, be sure to check our blog post describing what a sitemap is and how to configure it.
Sitemap Update and Generation – Basics
The good news is that you don’t need to be tech-savvy to generate and update a sitemap on your own. Naturally, if you work with a web developer, they know how to do it. However, if you have the ambition to handle this task all by yourself, here’s how you can do it.
First, you can generate and update your sitemap manually, using the Google how-to manual on sitemaps. However, be advised that this may be pretty time-consuming and labor-intensive.
Even in the case of relatively small websites, going through all the steps listed by Google already takes up a lot of time, not to mention the multi-page websites.
Therefore, to make this process more efficient, reach for the available tools. The thing is that the tools vary according to the CMS they’re meant to be used with. Don’t worry though, we’re going to give you clear instructions on how to handle each of the tools – more on that a bit later. Now, let’s focus on…
How to Add a Sitemap to Google Search Console
Before moving on to building and updating a sitemap, we’re going to show you how you can upload the sitemap to Google Search Console. This process is always the same, no matter the CMS you work with, or the tools you intend to use.
STEP 1 Sign into your Google Search Console account. Select Sitemaps that you can find in the left sidebar.

STEP 2 After clicking on that section, you will see all sitemaps that have been already updated. This is also the place where you can add a new one – just introduce the URL and click Submit.

That’s literally everything you have to do.
In case you’re now wondering where you can take the URL from, then no worries. You’ll learn that a bit later (note: it depends on the tool you decide to use).
How to Update Sitemap Using Plugins for Popular CMS
Let’s start with the most common CMS, which is WordPress. The good news is that WordPress supports free plugins designed to build and automatically upload the latest version of sitemaps.
The plugin that we’ve tested, and therefore can recommend to you, is YoastSEO. This is a free tool, offering a number of functionalities. Among them, there is one that allows you to generate and upload sitemaps automatically.
Here’s a short step-by-step manual:
How to Update Sitemap Automatically Using Yoast SEO
STEP 1 Sign into your WordPress account. Click on Yoast SEO, and later click on General.

STEP 2 Now, click on the Features tab.

STEP 3 Next, you need to find the .xml Sitemap tile and switch it on.

That’s all. Congrats!
By doing so, Yoast SEO will generate your sitemap, automatically including all new pages. As a matter of fact, once you activate this option in YoastSEO, you can be sure that all sitemap-related issues will be taken care of on their own.
Remember when we talked about adding a sitemap’s URL to GSC?
Here’s how you can do it.
After clicking on the blue question mark and later on See the xml sitemap, you will be moved to your sitemap. This is the place where you can take the URL from to copy and paste it into Google Search Console.
The best thing about this is that you need to do this only once. Later, every time you add a new page or a piece of content, Yoast SEO will automatically update the sitemap, keeping the URL unchanged. That’s how GSC will see all the changes you introduce to your website.
Moreover, Yoast SEO allows you to exclude some types of pages from the sitemap. This is handy when you don’t want a specific piece of content published on your website to be indexed (e.g. PDFs).
To do so, find Search Appearance in the Yoast SEO menu, and later click on the Content Types tab.

Then, you’ll see various types of content from which you can select those that you wish to appear in search results, keeping the rest excluded from the sitemap.

This functionality allows you to manage the sections of your website. Even though you probably want the majority of the pages to be included in the sitemap and get indexed by Googlebots, there may be some pages (e.g. Privacy Policy) to better stay unindexed.
If you want to leave some pages unindexed, select them in the Content Types tab. This way they get the noindex tag, thus remaining excluded from your sitemap.
A BRIEF SUMMARY
As you can see, this plugin does the job for you. So, when you use WordPress and haven’t used YoastSEO yet, just give it a go. Getting it up and running is super easy. And the best thing is that once you set it up, you don’t need to bother about updating your sitemap any longer – it updates itself automatically.
How to Update Sitemap Automatically in Other Popular CMS Platforms
If you don’t use WordPress – no worries! Truth is, you can generate and update sitemaps automatically no matter the CMS you use. The thing is that this functionality is either built-in or must be installed separately via plugins, tools, or modules.
To spare you time browsing which option is available for you, I’ll give you the names of the sitemap-updating plugins, tools, and modules you can add to popular content management systems such as Joomla, Drupal, or Wix.
NOTE Please notice the following descriptions won’t be as detailed as the above WordPress + Yoast installation process. I’m going to give you the exact locations where you can find the sitemap-related functionality in other popular CMS platforms, as well as the names of individual plugins.
How to Update Sitemap Automatically in Joomla
Plugin or module required? ✔️
Suggested plugin: JSitemap
Can be downloaded from Joomla! Extensions Directory
JSitemap allows for the creation of all sorts of XML and HTML sitemaps pretty effortlessly. Once you install this plugin on Joomla, you will be able to generate responsive HTML sitemap, geolocation XML/KML sitemap, mobile devices XML sitemap, and many, many more. Besides, JSitemap is said to be the equivalent of Yoast, meaning you can use it for other purposes to improve your SEO efforts. Some of its functionalities include canonical tag management, a keyword research tool, and a links analyzer.
How to Update Sitemap Automatically in Shopify
Plugin or module required? ❌
Additional info on the process: Shopify Help Center
No matter your plan, whether it’s Basic, Advanced, or Shopify Plus, this CMS generates and uploads sitemaps automatically by adding new pages to your existing sitemap. This means that whenever you add a new blog post, expand your product range, or upload new product images, Sopify will add those new elements to the sitemap.xml file without you initiating the process. If you want to take a look at the latest version of your sitemap, you can find it in the following directory: your-domain.com/sitemap.xml.
How to Update Sitemap Automatically in Hubspot CMS
Plugin or module required? ❌
Additional info on the process: HubSpot Knowledge Base
If you use Hubspot as your CMS, then you don’t need to bother much about the sitemap updates. There are two things to bear in mind, though. First thing is that even though this CMS handles adding new web pages and blog posts to the sitemap on its own, it doesn’t do this with landing pages – you simply need to add them manually. The other thing is that once you remove a page from the sitemap file, the chances are it may still be indexed. To view your sitemap file, you can either do this the standard way by adding /sitemap.xml to the end of your domain or by going to settings in the navigation bar (for more info, check out the above link).
How to Update Sitemap Automatically in Drupal
Plugin or module required? ✔️
Suggested module: XML Sitemap
Can be downloaded from: Drupal Download & Extend
Additional info on the process: Drupal
XML Sitemap is a smart module you can install to Drupal to get the sitemaps generated and updated automatically. It allows for including or excluding entities from the file – basically, it gives you the opportunity to customize the entire process a bit. It’s also worth noting that the Drupal module comes with a nice pack of submodules. They allow you to add menu items, user profiles, and links for content, to name just a few.
How to Update Sitemap Automatically in Wix
Plugin or module required? ✔️
Suggested tool: The Wix SEO Wiz
Can be downloaded from: Wix Official
Additional info on the process: Wix Help Center
Wix is known for being a super simple platform that you can use to handle web design without coding. Luckily, getting your sitemap updated automatically is comparably easy. First, you need to get the Wix SEO Wiz tool. Then, you need to connect your website to Google Search Console via Wix SEO Wiz and wait for the tool to index your website. Whenever you make changes to your website, this tool will handle updating your sitemap so you don’t need to submit it to the server yourself. It’s also worth adding that this tool is a kind of checklist that allows you to customize your sitemap.
How to Update Sitemap Automatically in BigCommerce
Plugin or module required? ❌
Additional info on the process: BigCommerce Help Center
If you use BigCommerce as your CMS, sitemap file creation is done automatically. You don’t need to bother about updating your sitemap to the server when you do some minor, everyday updates. However, if you made some major changes, e.g. if you delete a substantial number of products from your online store, it’s suggested to generate and re-submit the updated sitemap file manually. The location of your XML sitemap is standard, and you can find it under: yourdomain.com/xmlsitemap.php
How to Update Sitemap Automatically in Magento
Plugin or module required? ❌
Additional info on the process: Mageplaza Blog
Magneto is another CMS with a built-in feature that updates sitemaps for you. To do this, you need to go to the Admin Panel and click Stores and select Configuration, and later Catalog. Finally, you get to the XML Sitemap that offers you some options to customize the process of automatic sitemap updates. For example, you can select the frequency, indicating how often your website is likely to change. You can also give priorities to some pages. In general, Magneto gives you numerous options to pick and choose from to customize the process of automatic sitemap updates.
How to Update Sitemap Automatically in Presta
Plugin or module required? ✔️
Suggested module: PrestaShop gsitemap
Can be downloaded from: GitHub
Additional info on the process: Belvg blog
To make your sitemap update automatically, you need to install and configure a PrestaShop module. Once you download it, open the Admin Panel and click Modules. Later you upload the module and you’re free to configure it to your liking. For example, you define the frequency of changes introduced to your store. You also select the elements you don’t want to include in your sitemap, e.g. contact up page, shopping cart, and authorization page. Later add the file to Google Search Console. Finally, create a Cron job (more on that below) so the whole process is initiated automatically.
How to Update Sitemap Automatically in Shopware
Plugin or module required? ❌
Additional info on the process: Shopware Guides
The sitemap generation feature is a built-in one in Shopware, so you don’t need to bother to install new plugins. Basically, you can either ask the CMS to add new pieces of information to the existing sitemap file or generate a completely new one. Here you can also define the so-called Refresh time, which is the frequency at which the updated sitemap file should be generated automatically.
How to Update a Sitemap if You’re Using a Custom CMS
Keeping your sitemap updated automatically when you use a custom CMS may be a bit more strenuous.
This solution is mostly chosen by the owners of large, multi-page websites for whom keeping the sitemap up-to-date is almost predominant.
The thing with a custom CMS is that it doesn’t give you the chance to make use of the plugins like you can with WordPress.
Therefore, if your developer team didn’t work out a solution that would allow the sitemap to be generated and updated automatically, or if they can’t prepare a module that would handle this task using the database, there is no other way for you than to find other solutions.
Lucky for you, this can be done.
There are some pretty simple and quick ways to partially or even completely automate the process of uploading new sitemaps to your custom CMS. All you need to do is get the right tools, like for example Screaming Frog.

How to Generate a Sitemap with Screaming Frog
No matter if you use a paid or free version of Screaming Frog (we’re going to show you both scenarios), you can do both: generate and update the sitemap. Keep in mind though that you can access the full automation only by getting the paid version.
However, if you have a go at the free version, the Screaming Frog tool will allow you to scan websites consisting of up to 500 URLs.
STEP 1 Begin with building a sitemap. To do so, you need to let the Screaming Frog crawl your website first.
Insert the URL, click Crawl and wait patiently for the crawls to pass along all the links and pages. This way you receive a list of all your website’s URLs.

STEP 2 When crawling is finished, go to the top menu. Click Sitemaps to get to the dropdown menu, where you can find XML Sitemap.

By clicking on XML Sitemap, you export the sitemap that you can later upload to the server, and add to the GSC, naturally.
However, before the sitemap gets exported, the below window will appear on your screen. Screaming Frog asks you which pages you want it to include in the sitemap.

In its most basic settings, you don’t need to select anything.
Screaming Frog will generate a regular sitemap, leaving noindex pages out. You may consider changing the settings if you need a certain page to be included in the sitemap. This is mainly connected to following some atypical SEO strategies. This is rare, though.
Bear in mind to select hreflangs if your website is multilingual. You can do this by clicking on the last tab placed in the top menu.
In case you would like to understand why your multilingual website needs hreflangs, read our post: Hreflangs. How to Tag the Language Versions of Your Website

STEP 3 Finally, click the green Export button. The .xml sitemap will appear in the location you picked a few moments before.

This is basically what your sitemap will look like.
STEP 4 When your sitemap is ready, you can upload it to the server which, we assume, you will leave to your developer team.
STEP 5 Now, you can add the URL to Google Search Console following the steps described above.
How to Update Sitemap with Free Version of Screaming Frog
Having the sitemap generated and added to GSC, you need to make sure it’s updated regularly.
Custom CMSs don’t integrate with external plugins, so if your developer team hasn’t prepared a special module handling the automatic sitemap update, then you need to do this outside of your content management system.
If the changes made on your website are fairly big, (so if you added many new URLs), then obviously you can go through all the steps described above to generate a new sitemap and upload it to the server.
However, if you rarely introduce new elements to your website, or when these are just individual modifications that you apply from time to time, you may take another approach.
Use the exported file and add the new pages manually, skipping the crawling process. Here is how to do this correctly.
STEP 1 Open the sitemap. You can use Notepad for that. Naturally, you may reach for some more advanced programs, however, Notepad works just fine.

STEP 2 Select the sections from <url> to </url>. Copy and paste them right underneath. In the pasted section, replace the doubled URL with the new one – the one you’ve added to the website.
STEP 3 Since you probably do this on your laptop, you need to upload the updated file to the server, just like you did after creating the sitemap the first time. Just replace the old sitemap file with the updated .xml.
The good news is that you don’t need to add a new URL to Google Search Console. The sitemap address remains unchanged so expect GSC to detect the updated file automatically.
This process doesn’t seem to be complicated, does it?
Things can however get a bit more cumbersome if you have to handle a multi-page website built in a custom CMS. If you introduce modifications regularly, updating your sitemap manually may occupy too much time in your already busy schedule.
In such a case, we suggest taking one step further, and getting the sitemap updated automatically. For that, you need a paid version of Screaming Frog.
How to Update Sitemap Automatically with Paid Screaming Frog
Although you need a developer to make this process 100% automated, there is a great chance you can make it almost fully automated on your own. Don’t worry, you don’t need to have the technical knowledge to do this properly.
After purchasing a license, Screaming Frog offers you more advanced features. For example, it allows you to generate sitemaps automatically.
The best bit about this preprogrammed process is that it always follows the instructions you give it beforehand. Basically, you can do this just once so that Screaming Frog knows what aspects it should include generating new sitemaps at predefined intervals.
Here’s how you can do this.
STEP 1 Click File (top menu) to see a dropdown menu. Click Scheduling.

STEP 2 Click the Add button, and you’ll see a window for creating an automated task.
STEP 3 Introduce the basic information such as Task Name, Project Name, Description and the time you want the task to be launched.

STEP 4 Now click on the Export tab. This is the place where you define which data you want to get exported after the crawl. You also chose the location where you want the updated sitemap to be saved.

STEP 5 In the above screenshot there are two things selected: Save Crawl and Create XML Sitemap. We needed both files, however, if you need just the latest version of your sitemap, select the latter only.
STEP 6 Finally, select the crawl options. Go to the Start Options tab. In Crawler Mode choose Spider, and in Crawl Seed add your website’s URL. Done.
In this simple way, you instruct Screaming Frog how often you want it to crawl your website to export the most recent sitemap to your disk. All you need to do later is simply upload the .xml file to the server to make sure the sitemap is always updated.
The good news is that there is a way to make the new sitemap replace its old version on the server.
In short, this is how the process looks: Screaming Frog exports the sitemap file to the local repository. Then you make use of a pipeline (a set of automated processes) to export the sitemap file from the repository to your server – that’s basically it.
The thing is, though, that even though this process may seem pretty straightforward, it actually requires a developer’s help. If you would like to gain a general understanding of how this pipeline works, here is…
How to Update the Sitemap Using Custom Scripts & Cron
Let me start by telling you that what you’re going to read in this section is just a general overview of how to get the sitemap exported automatically to your server. There is no one-size-fits-all solution that would apply and work for both the Cron and the automated script that you need for this process – a lot depends on your website structure and the way you want your sitemap file to be generated, to name just two variables.
First things first: What is Cron? It’s a scheduler. It’s a program that arranges operations into a desired sequence. To put it even simpler, Cron initiates the operations to run at a particular date and time. This can be compared to an app you use to set a schedule with Roomba, telling it what rooms in which order you want it to clean at a given time of the day, periodically. However, you must realize that Cron is responsible only for initiating the execution of jobs, it is NOT designed to execute those jobs. Execution is the script’s job.
In most cases, scripts for generating and updating sitemaps are written in Phyton, no matter the CMS they are going to be integrated with. What matters though is that the script must factor in not only your website structure but also your goals.
When it comes to the process of creating a sitemap then I’ve already sketched it out above. Therefore, let me just give you 5 tips:
TIP #1
It’s way more efficient to divide a script into sections to generate a few smaller sitemaps, e.g. blog sitemap, category page sitemap, or product page sitemap. This way you don’t use your processing power to create new sitemaps of the website elements that haven’t changed a bit. Moreover, such a solution allows you to customize the process. Cron will run the script on a given date to generate the sitemap following the guidelines drawn up by a developer you work with.
TIP #2
There is another reason why creating a few smaller sitemaps instead of just a bigger one makes more sense. There is a chance that when the script starts executing a thousand commands at the same time – which, let’s assume, happens every week – it may literally disrupt the normal traffic or even make your website completely unavailable to the users. That is why each script should have a limit on the number of pages it can run in a single execution.
TIP #3
You may try writing separate scripts to initiate the process of uploading individual smaller sitemaps. After uploading those scripts to the server, each one gets its own URL, e.g. url_address/sitemap_blog.py and url_address/sitemap_category.py. Later, use Cron to create jobs to run a given script at a scheduled date. This solution is useful when there is no need for a whole sitemap to be generated periodically. I guess you would agree with me that creating a sitemap file that is identical to the one you already have on your server is rather pointless as it completely unnecessarily consumes your processing power.
Example Imagine the following situation: your updated sitemap is generated automatically every month. However, you run a blogging process, and therefore need a new blog sitemap every time you add a new post.
Let’s assume you post new entries every Thursday around noon, that’s why you created a Cron job that runs url_address/sitemap_blog.py every Thursday at 2:00 PM.
Today is Monday and you’ve just published an extra blog post but you don’t want to wait till Thursday to get it included in the sitemap. To update the blog sitemap sooner, you simply need to type the right URL address into the browser, which in this case would be url_address/sitemap_blog.py. Done, your today’s post has just been included in the blog sitemap.
I know that this isn’t a fully automated process, yet the required effort is minimal.
TIP #4
I advise against building a completely new sitemap when you actually need just an update. Ask your developer to write a script that looks for the changes that have been made since the last update and just replace or delete the elements that are different. Again, this will save you processing power.
TIP #5
Think about the elements that don’t have to be included in your sitemap. To me, these are links to your social media accounts, for example. Make the sitemap simple and concise, so it’s indexed faster by search engines.
To sum up, as you can see, it’s impossible to provide you with a ready-made solution or step-by-step manual on creating a custom Cron job and the script to generate/update your sitemap file. That’s why I suggest you contact your developer and ask them to write customized scripts, and configure and prepare cron jobs to suit your needs.
How to Update a Sitemap Automatically – The Takeaway
With so many business-related things that you have to carry on your shoulders every day, it’s hard to keep a check on everything that’s important for your brand to grow. Occupying your time with processes that can be fully automated would be a waste of your precious time and energy, wouldn’t it?
That’s why automated sitemap updating is one of those processes that can be easily implemented by yourself or a developer team. If you use WordPress, then you need to take just three simple steps to get it done. The issue gets a bit more problematic if you use a custom CMS, yet it’s still doable.
Always be 100% sure that Google Search Console sees the latest version of your sitemap. Make it easier for the crawlers to find the new pieces of your content. Otherwise, nobody will see it, read it or react to it. This is not what you create your content for, right?
An automated sitemap update is just one element of a well-devised SEO strategy. Having it done is just one small, but absolutely essential SEO factor that helps you boost visibility. Without it, you risk your website having a hard time reaching your prospects.
If you would like to use professional help with your sitemap, or with any other SEO-related issues, just contact us. Our SEO and developer team will analyze your website and map out a customized SEO strategy for increased visibility.